Cloudflare's Rocket Loader is an asynchronous JavaScript loader that immediately improves the page load time of your website. It improves the speed of the site by making optimizations to your website's content like text, images, fonts, etc. This, in turn, improves the Google Search Rankings of your webpage.
However, many-a-times, Rocket Loader breaks the JavaScript code on the page as it switches the script loading order. So, when the order of the scripts is changed, it breaks some parts of the Oxygen libraries, and thus, Oxygen Addons like Oxy Extended do not run as expected.
So, here, in this tutorial, we will guide you on how to disable Cloudflare's Rocket Loader so that OxyExtended works without any issues.
There are 2 methods to resolve this issue:
- Add a page rule to disable the Rocket Loader feature for the oxygen builder pages.
- Disable Rocket Loader from Speed section.
We will go through each of these methods in detail.
Method 1: Add a page rule to disable the Rocket Loader feature for the Oxygen Builder pages.
Log in to your Cloudflare Account
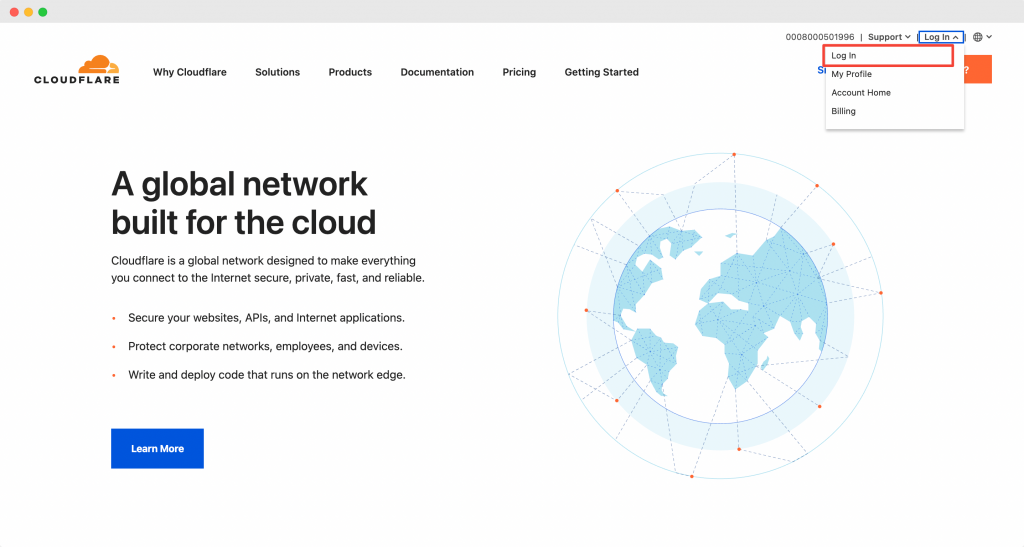
The first step that you need to follow to disable Cloudflare's Rocket Loader is logging in to your Cloudflare account.
You can easily log in to Cloudflare by heading over to https://www.cloudflare.com/ and clicking on "Log In" at the top-right corner of your screen.
Below is a screenshot for your reference.
Post logging into our account, you will have to select the site that is being used with Oxygen page builder and add a page rule to it.
Adding Page Rule to your Oxygen Builder Website
To add a "Page Rule", simply navigate to the Rules tab on the top of the screen.

Next, click on "Create Page Rule".
I have attached a screenshot below as it might help you in understanding.

Once you click on "Create Page Rule", a new page will open up and it will allow you to enter a URL on which the rule will be implemented. Apart from the URL, you can also choose settings for the Page Rule.
Check out the below screenshot for your reference.
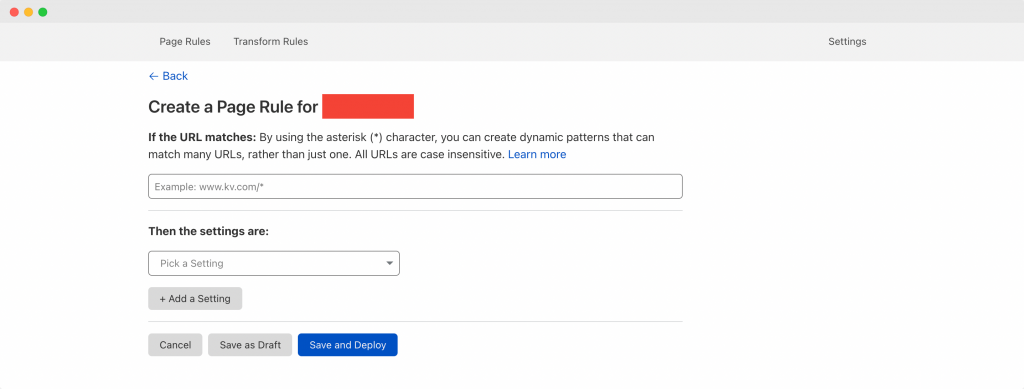
As visible in the above screenshot, there are 2 fields: "If the URL matches" and "Then the settings are".
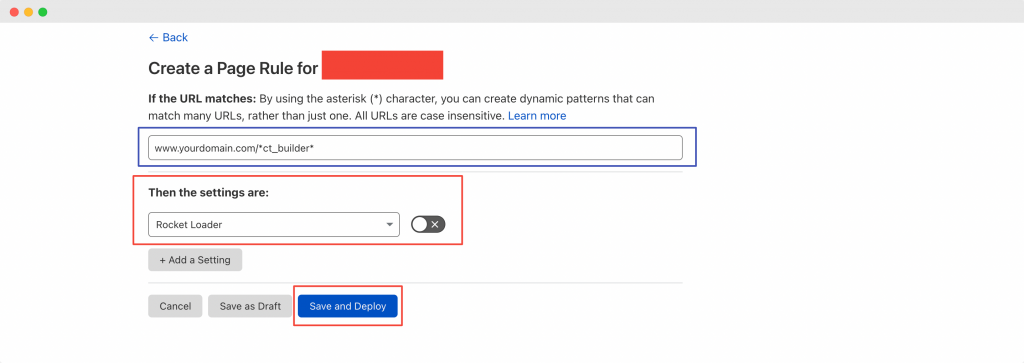
In the "If the URL matches" field, you'll have to put the page rule as www.yourdomain.com/*ct_builder*.
However, please note that you will have to replace www.yourdomain.com with your actual site URL. If you are not sure about adding www to your domain name, then, you can create two rules, one with www, and another without it.
Going further, in the "Then the settings are" section, you need to search for "Rocket Loader" and make sure it's set to off, then click the "Save and Deploy" button.
I have filled up both these options and added a screenshot here for your reference. Have a look at it below:
Once you click on "Save and Deploy", please be sure to clear your browser cache.
You'll see that you no longer encounter issues from Cloudflare's Rocket Loader. Further, Rocket Loader will still run on the frontend of your website and you can avail all its benefits without hampering the working flow of your site.
Another thing that you should keep in mind is, it will take a few minutes for these changes to take effect post clicking on the "Save and Deploy" button.
Method 2: Disable Rocket Loader from Speed Section
Many-a-times it happens that the first method where we add page rules to disable Rocket Loader doesn't work. So, as an alternative, we will look at the second method.
In this method, we will fully disable the Rocket Loader from your website till the time you are making changes on it, and then, you can again activate it when you are ready to publish your website.
To disable Rocket Loader, please go to the Cloudflare Dashboard and click on the "Speed" tab.
Have a look at the below screenshot for your reference.

Next, the speed page will open up. There, click on the "Optimizations" tab and scroll down to the "Rocket Loader" section.
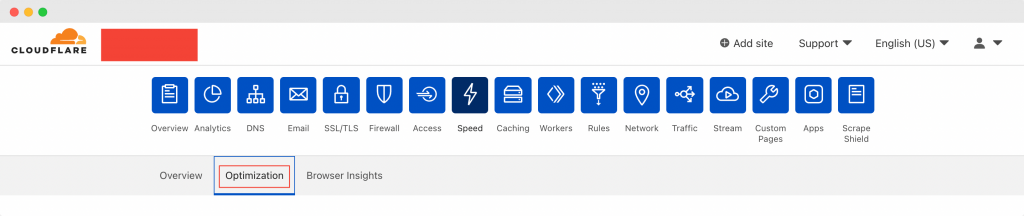
Check out the below screenshot for the same.
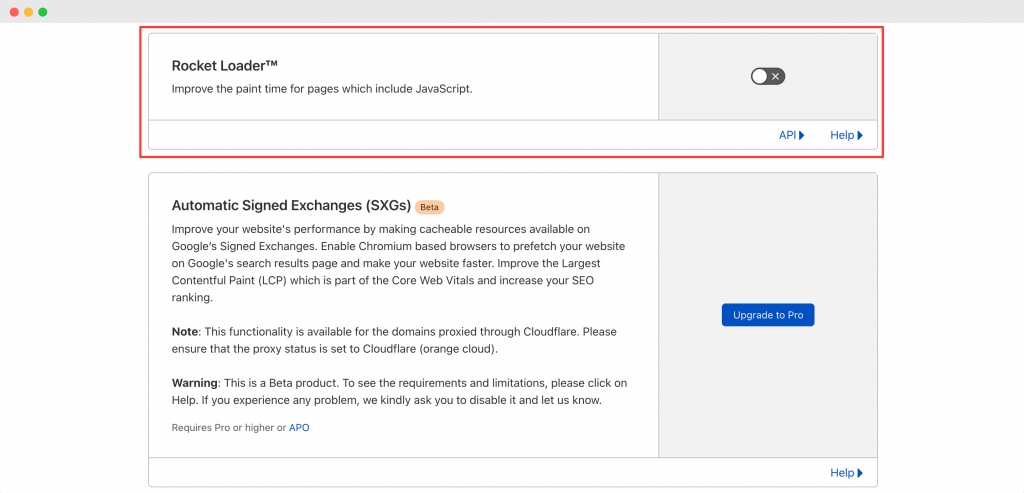
Make sure that the "Rocket Loader" switch is turned off as visible in the above screenshot.
Wrapping it Up!
That's it! This was all about disabling Cloudflare’s Rocket Loader in the Oxygen Page Builder using 2 simple methods. 🙂
I am sure, with the help of this tutorial, you would have been able to improve your site-building workflow with Oxygen Builder and OxyExtended along with using Cloudflare.
You can do a lot more with the OxyExtended Addons for Oxygen Builder.
What are your thoughts on this tutorial? Do share if you found this guide useful!